
એક્સચેન્જ અને વૉલેટ
Binance USDT ખોટા network પર ગયું?
USDT મોકલ્યા પછી network ખોટું હોવાનું કે Memo રહી ગયું હોવાનું સમજાયું? TxID, receiving walletનો પ્રકાર અને private-key control પરથી recoveryની શક્યતા કેવી રીતે તપાસવી તે જાણો.
USDT wrong network પર મોકલાઈ ગયું હોય તો તરત બીજું transfer ન કરો. પહેલાં TxID, coin, amount, selected network, receiving address અને time સાચવો. Funds પાછા મળી શકે કે નહીં તેનો મુખ્ય આધાર receiving address self-custody wallet છે કે custodial exchange, અને તે addressની private key તમારા controlમાં છે કે નહીં તેના પર છે. Recovery ક્યારેય guaranteed નથી.
આ guide TRC20/ERC20/BEP20 mismatch, missing Memo/Tag અને Binance deposit credit ન થવાના અલગ casesને સમજાવે છે. માહિતી Binanceના 10 August 2026 સુધી ઉપલબ્ધ official resources પરથી તપાસેલી છે.
હમણાં શું ન કરવું
- એ જ address પર ફરી મોટું amount મોકલી “test” ન કરો.
- Seed phrase, private key, password અથવા 2FA code કોઈ support agentને ન આપો.
- Telegram/WhatsApp પર મળેલી recovery link ખોલશો નહીં.
- Random bridge અથવા token-recovery websiteને wallet approval ન આપો.
એક જ USDT છતાં network કેમ અલગ છે?
USDT token વિવિધ blockchains પર હોઈ શકે છે. TRC20 TRON પર, ERC20 Ethereum પર અને BEP20 BNB Smart Chain પર ચાલે છે. Senderએ પસંદ કરેલું network receiverના deposit network સાથે match થવું જ જોઈએ. Ethereum અને BSC address બંને 0xથી શરૂ થઈ શકે છે, પણ તેનાથી networks સમાન થતા નથી.
| Sender network | Receiver support | પરિણામ |
|---|---|---|
| TRC20 | TRC20 | confirmations પછી સામાન્ય deposit flow |
| ERC20 | ફક્ત BEP20 | token બીજી chain પર પહોંચી શકે; custodial receiver credit ન કરે |
| BEP20 | self-custody, same key | compatible walletમાં BSC switch કરીને token દેખાવાની શક્યતા |
| Any network | wrong address owner | blockchain transfer સામાન્ય રીતે reverse ન થાય |
Step 1: TxID blockchain પર શું કહે છે?
Sending wallet/exchangeના withdrawal historyમાંથી TxID લો. તે networkના official explorerમાં નીચે તપાસો:
- Transaction Success, Pending કે Failed છે?
- To address Binanceએ આપેલા address સાથે સંપૂર્ણ match થાય છે?
- Token contract સાચો USDT contract છે?
- Amount અને network કયા છે?
- Confirmations પૂરતા થયા છે?
TxID જ ન હોય તો transaction કદાચ broadcast થયું નથી. આવી સ્થિતિમાં receiving side નહીં, sending platformને પૂછવું પડે. Full TxID public forumમાં મુકશો નહીં; official support caseમાં જરૂરી હોય ત્યારે જ આપો.
Step 2: Receiving wallet કોણ control કરે છે?
તમારું self-custody wallet
જો addressની private key/seed phrase તમારી પાસે છે, token કદાચ ખોવાયો નથી; wallet app માત્ર તે network બતાવતું ન હોય. Binance Academyની official wrong-network guide મુજબ compatible walletમાં same key import કરીને actual network પસંદ કરવું અને official token contract add કરવું શક્ય હોઈ શકે છે.
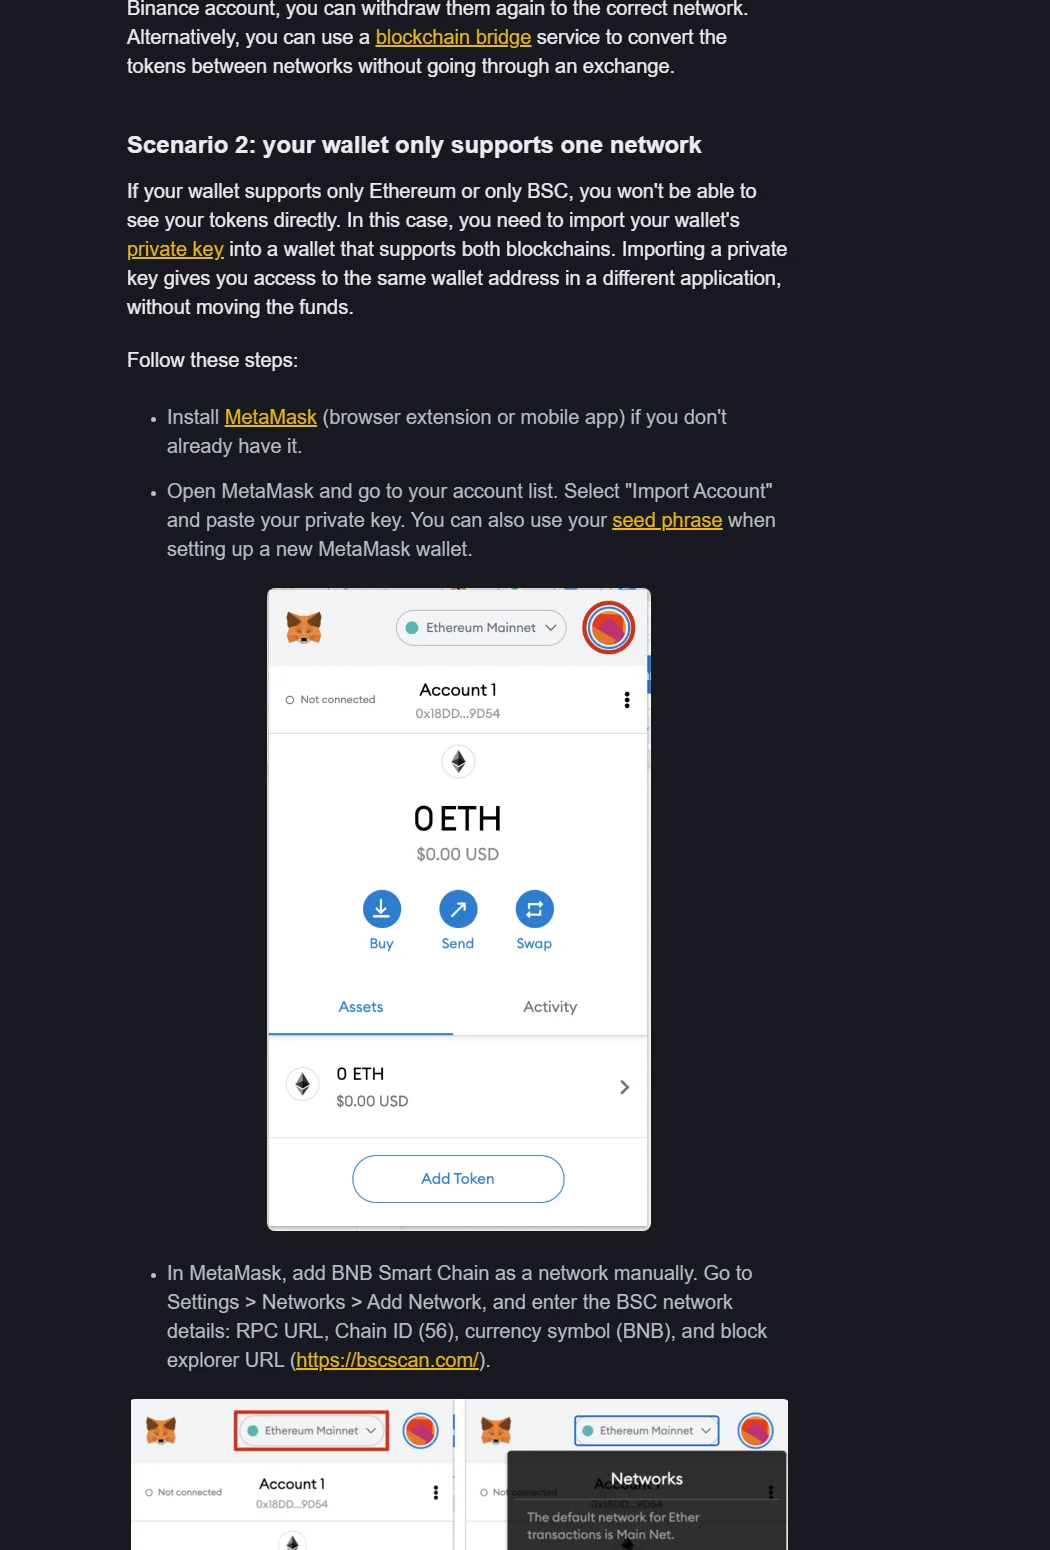
પરંતુ પહેલાં આ checks કરો:
- App સાચી official wallet app છે?
- Network અને chain ID official documentationમાંથી લીધા છે?
- Token contract verified sourceમાંથી છે?
- Token પાછું મોકલવા gas coin ઉપલબ્ધ છે, જેમ કે BSC માટે થોડું BNB?
- Seed phrase local trusted app સિવાય ક્યાંય paste થતી નથી?
Private key operation સમજાતું ન હોય તો અટકવું વધુ સુરક્ષિત છે. “Recovery expert”ને seed phrase આપવી recovery નથી; તે walletનો સંપૂર્ણ control આપવો છે.
Binance અથવા બીજું custodial exchange
Custodial deposit addressની key તમારી પાસે નથી. તમે તેને MetaMaskમાં import કરી શકતા નથી. Receiving platform જ નક્કી કરી શકે કે unsupported network/tokenને identify અને recover કરી શકાય કે નહીં. Binance Academyની 2026 guide wrong-network Binance deposit માટે recovery ઉપલબ્ધ ન પણ હોઈ શકે એમ સ્પષ્ટ ચેતવે છે.
Binance accountમાં Deposit Status Query અથવા self-service recovery દેખાય તો application કરી શકાય, પરંતુ button દેખાવું approvalની guarantee નથી. તૈયાર રાખો:
- TxID અને sending address;
- coin, amount અને actual network;
- Binance deposit address;
- withdrawal recordનું unedited proof, અનાવશ્યક personal details ઢાંકી;
- transaction time.
ફક્ત binance.com domain અથવા Binance appની અંદરથી service ખોલો.
Missing Memo/Tag હોય તો?
કેટલાક coinsમાં exchange એક common deposit address વાપરે છે અને Memo/Tag/Payment IDથી user ઓળખે છે. Address અને network સાચા હોવા છતાં Memo missing કે wrong હોય તો blockchain transaction successful હોઈ શકે, પણ account credit આપમેળે નહીં થાય.
Memo હવે chain પર edit કરી શકાતું નથી. Self-service processમાં TxID, amount, sender address અને account verificationથી ownership prove કરવી પડે. Fee, processing time અને eligibility case પ્રમાણે બદલાઈ શકે છે.
Result પ્રમાણે next action
| Check | Action |
|---|---|
| TxID નથી | Sending platformને broadcast status પૂછો |
| Failed | Sender balance/refund status તપાસો |
| Pending | Network confirmationની રાહ જુઓ; duplicate transfer ન કરો |
| Success + own self-custody | Actual chain અને contract verify કરીને compatible walletમાં જુઓ |
| Success + Binance address | Network, address, Memo અને confirmations ચકાસી official recovery/query submit કરો |
| Success + someone else’s address | Address owner/platformનો સંપર્ક કરો; reversal guaranteed નથી |
ફરી ભૂલ ન થાય તે માટે
- Receiver side પર coin અને network પહેલાં પસંદ કરો.
- Sender side પર એ જ network પસંદ કરો; fee ઓછી છે એટલે બીજું network ન લો.
- આખું address compare કરો, માત્ર first/last characters નહીં.
- Memo/Tag માંગવામાં આવે તો તેને address જેટલું જ જરૂરી માનો.
- New route માટે small test transfer કરો.
- Deposit credited થયા પછી જ balance amount મોકલો.
Buy, Deposit, Transfer અને Withdrawનો તફાવત અને USDT network તથા wallet basics પહેલાં સમજવાથી આવી ભૂલો ઘટે છે.
Account બનાવવાનું બાકી છે?
BI27XB92 registration checklist વાંચ્યા પછી Binance official referral link વાપરી શકો છો. “Up to 20%” rebateની actual eligibility region અને registration સમયે દેખાતી terms પર આધારિત છે.
Affiliate disclosure: Link referral link છે; eligible activityથી siteને reward મળી શકે છે.
Official sources
- Binance Academy: Wrong Network Recovery
- Binance Self-Service Deposit Recovery
- Binance: Check Transaction Status on Blockchain
છેલ્લી ચકાસણી: 10 August 2026 (UTC+8). Recovery eligibility, fee અને time account તથા case પ્રમાણે બદલાઈ શકે છે.